Molds
The mold on your Power Curber might just be the most important part of the machine. And whether you need to meet municipal specifications or want help from our Mold Department to create a custom concrete curb mold for your particular project, we pride ourselves on building quality molds to help you be successful.
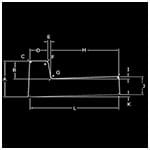
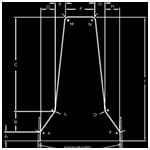
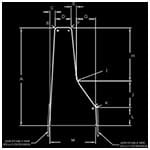
Contact The Experts
Get in touch with our Mold Department today to get started on your next project.
Email / molds@powercurbers.com
Phone / 704.647.6159
Mold Personalization
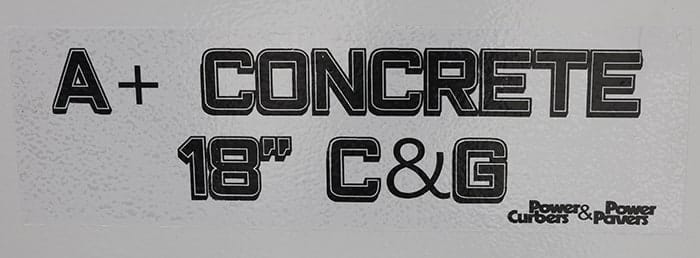
Personalize your molds in addition to the mold number. We offer two ways to customize molds. You can order a steel plate or vinyl label with a maximum limit of 2 rows with 10 characters each (all caps). Some examples:
A+CONCRETE
18" C&G
PCURBERS
NCDOTMOLD
THE JOB ON
BENDIX DR
MY COMPANY
MOLD # 15
To Order a Personalization Label:
1) Download the Form Below
2) Complete the Form
3) Email the Form to molds@powercurbers.com
Download the Mold Personalization Form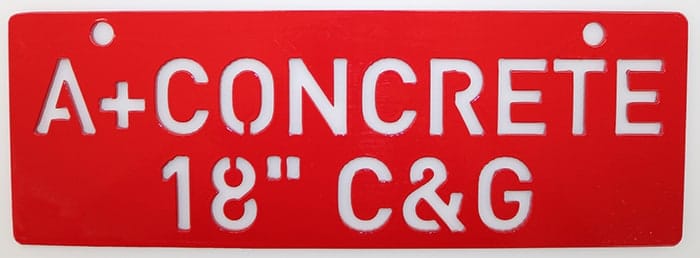
Applications
- Curb & gutter
- Rollover / Mountable Curb
- Header Curb
- Barrier
- Barrier
- Variable Barrier
- Bridge Parapet
- Sidewalk
- Monolithic
- Rehab
- Ditch
- Canals
- Dams
- Stadium Risers
- Agriculture
- Slot Drain
- High Speed Rail
- Center Pour / Paving
- Tunnels
MOLD FAQS
You can look at our Mold Options to learn more about the molds we offer.
Batter is the amount of slope added to vertical faces of a mold that allows the concrete to stand once poured. Power Curbers’ recommendation is 4% batter, or ½” per vertical foot. Batter allows for faster pouring and helps compensate for slightly imperfect mix. Batter will be noted on all mold drawings.
A screed gives a finishing edge to the concrete, and the gap between the shell and the screed allows cream and air bubbles to escape the concrete. The cream is used during finishing. Screeds are only used in curb & gutter molds. When used correctly, a screed can essentially pre-finish your curb ahead of the finishing crew.
A screed cannot be used on molds with certain options, such as open or detachable toes or hydraulic sides. When a screed cannot be used, weep slots can be cut into the mold to allow the cream and air to escape.
Not all options work well on the same mold, resulting in a mold that does not produce the highest quality result. Consult the Mold Department to discuss whether the options you want are compatible with each other for use on the same mold.
An integral hopper is built into the mold, rather than a separate hopper that attaches to the top of the mold using turnbuckles. The hopper and the mold are one piece.
Molds that are wider than 32” require an integral hopper. Small, narrow molds also work better with an integral hopper, as a standard hopper can cause a shelving effect with the concrete in the hopper.
Once you submit your requirements, our Mold Department will produce a scale drawing (A-size, 8.5×11”) and will send to you for approval. Once the drawing is signed and approved, your mold is released into production. Each mold begins as flat steel that is cut, bent, machined, and welded. It is then blasted and painted, and packed for shipping to you.
Click here to view the parts of a curb & gutter mold.
You can also click here to view our Molds Terminology page to learn more about mold types and the phrases commonly used in our industry.
A mule is a hand tool for finishing work. Some people interchange the terms mule and mold. In Power Curbers’ terminology, the form that attaches to the machine is referred to as the mold; mules are hand tools.
Barrier molds are attached using a manual mold mount rather than the Quick Connect. Barrier lift kits can be added for additional vertical lift of barrier molds.
A sidewalk kit is required for mounting molds wider than 4’ in the offset position. This extra equipment helps keep the mold stable and prevents lifting of the mold during pouring. A weight pod may be required on the opposite side of the machine to act as a counterweight for large offset applications such as sidewalks or ditches.
The mold number identifies your mold to our Mold Department for easy lookup and reordering. If you ever have a question about your mold, have the mold number handy for faster assistance.
Newer Power Curber molds have a mold number cut into the steel of a vertical plate, visible from the rear of the mold. On older molds, the mold number is typically stamped onto one of the vertical plates, usually visible from the rear of the mold. Extruder molds generally have the mold number stamped into the metal where the mold attaches to the compaction chamber.
Options
Barrier Lift Kit
The hydraulic barrier lift allows you to raise the mold up and off of a steel cage at the end of a day’s pour or to move the machine to a different part of the jobsite. It gives you an extra 24” (610 mm) of lift in addition to the 36” (914 mm) of post extension to allow you to clear tall steel cages.
Blockout
A blockout is used to change the pouring width of a mold. It is generally bolted into the gutter section of the mold, but can be used to remove a feature such as a step on the back of the curb that supports a sidewalk.
While the pouring width is reduced with a block-out, the overall width of the mold remains the same. Site preparation must be done to accommodate the fill width of the mold.
Safety should be observed as block-outs may have sharp edges where the block-out shell intersects the mold shell.
Bolt-on Extension
Bolt-on extensions increase the pouring height of a mold and are typically used in pairs. They attach to the bottom of the mold so the increased height is in the base. They do not change the height of the curb face.
A mold may have multiple extensions for pouring different heights. In some cases, extensions may be stacked to result in a different height (and reduce the overall number of extensions needed). As the height of the extension increases, they are more likely to deflect due to the pressure of the vibrated concrete against them.
Extensions are generally exchangeable between molds designed to accept them. If a mold is to be built to accept bolt-on extensions included with another mold, the drawing must reflect as such.
Detachable Toe
A detachable toe can be removed in order to place the gutter adjacent to existing pavement. When the toe is bolted in place, the same mold can pour stand-alone curb and gutter.
Difficulty with radii is one of the limitations of working adjacent to existing pavement. Excessive material waste and/or improper filling of the mold can occur. Also, the mold shell should not be allowed to overlap the existing pavement. Doing so may allow material to build up under the shell and cause it to lift.
Molds with a detachable toe are built without our normal adjustable screed. Vent slots are used to compensate for the absence of the screed. Taller toes, when in place, may deflect due to the pressure of the vibrated concrete against them. Detachable toes are not designed to be installed in a different location as a replacement for a block-out, except on sidewalk molds.
Driveway Knife
A driveway knife is used to reduce labor and wasted material at driveway entrances. When engaged, it prevents material from filling the curb portion of the mold.
Our standard knife utilizes a rotating plate through a slot in the mold shell to block the flow of concrete. It will not finish the surface but eliminates the need to remove the material by hand. It is common to position the knife so it leaves material for the finishers to complete the entrance.
A side entry style of driveway knife can also be used. This is a sliding plate that enters the curb portion of the mold from the side and is formed to create a slight choke. The side-to-side slope is normally flat. The side entry design provides a better, but not perfect, finish at driveway entrances. The transitions from curb to driveway still require forming and finishing by hand.
The slope of the gutter may be such that the side-entry style cannot be used. Each mold must be individually analyzed to determine its compatibility. Other mold options may not be compatible with a side-entry knife. This design requires disassembly and cleaning after each use of the mold.
Hand Mule
This is a hand tool for finishing work. Some people interchange the terms mule and mold. In Power Curbers’ terminology, the form that attaches to the machine is referred to as the mold; mules are hand tools.
Hydraulic Side Plates
Hydraulic side plates are helpful when the grade on your job causes concrete loss. Adjusting the side plates can help contain concrete and prevent costly blowouts in low-grade areas. They are commonly used on barrier and parapet molds, but can also be used with curb & gutter molds. Hydraulic side plates typically give you 4” of adjustability.
Integral Hopper
An integral hopper is built into the mold, rather than a separate hopper that attaches to the top of the mold using turnbuckles. The hopper and the mold are one piece.
Molds that are wider than 32” require an integral hopper. Small, narrow molds also work better with an integral hopper.
Porched Open Front
When pouring over reinforcing steel, the front of a mold must be open to allow the steel to pass through. A “porch” surrounds the opening and extends towards the front in order to contain the concrete that escapes through the opening. This is common on molds for bridge parapets, barriers, and is sometimes used in curbs, sidewalks, or other applications. (Note: The trimmer cannot be used when steel is present and must be shifted completely out of the way.)
Generally, the porch is designed integral to the mold, but may be designed as removable. Due to possible interference with the trimmer and difficulty when pouring downhill, a mold with an open front should not be used unless reinforcing steel is present. A porched open front may be used in conjunction with an open toe to allow the mold to operate over tie bars extending from existing pavement. (See Detachable Toe) Extreme care must be used when pouring a radius over steel as interference with the mold may result.
Rebar Port
A rebar port is a funnel-shaped tube bolted through a hole in the front of a mold. It allows a single piece of rebar to be fed into the mold and embedded longitudinally into the concrete. Multiple ports may be used on a single mold as per rebar requirements.
When not in use, rebar ports may be removed and replaced with plates to cover the holes. It is not possible to pour a radius when installing rebar.
Wear Plates
A wear plate is a replaceable section at the bottom of the mold shell. They are actually 1”-long bolt-on extensions. (See Bolt-on Extension) When wear plates are part of the mold design, the shell is built 1” shorter than the specification. The use of wear plates can extend the life of a mold.
Variable Barrier
Sometimes the sides of a barrier wall have different elevations, which require flexibility in the sides of a barrier mold. A variable barrier mold gives you up to 24” (610 mm) of variability in the sides of the mold, using hydraulically moveable sides to allow for differing elevations.
150 EXTRUDER STOCK MOLDS
Certain molds for the 150 extruder are commonly used and are kept in stock.
To order these molds, simply contact the Parts Department with the mold number to order.